Herbalism is so much more than tea and poultices. It is a spiritual path of learning the rhythms of the earth and celestial bodies in their eternal dance and the magic their cycles bring to our lives. Healing is not only about our physical body- it is about being aligned to our core and understanding ourselves deeply so that our mind, body, and spirit are in balance and create a state of wholeness.I am an herbalist who at an early age explored this connection between the spirits of nature and the health of the body. As a child, I grew chamomile, lemon balm, and aloe and breathed deep their fragrant leaves. I studied myth, legend, and connected to elemental energies. Later on my path, I started examining the planetary emanations that effected growth of all things and finally found a true understanding of wellness.
Here in this space we will explore these themes of healing, beauty, and soul. I hope you will join me and explore my hand made tinctures, balms, and candles and to take our time in this spiritual garden.
When Autumn is upon us, we either begin changing the way we care for ourselves or our immune system becomes quickly overwhelmed. Here are some ways you can ease your body into fall and winter naturally to prevent illness.
Autumn is my favorite time of year. This may come as a surprise because of my relationship with plants, but there is something very clear and refreshing about the crisp winds that blow around us and the coziness that we can find indoors. The apothecary is well stocked from summer’s abundance and the dehydrator is often humming with the last herbs from the garden.
This is the time of year when our immune system needs to be at it’s strongest. As the season changes, our body is trying to catch up and is often worn out by summer work and play. Here’s how to ease gently into the transition to give our body what it needs.
Don’t fight the transition. It may be tempting not to wear a scarf, hoodie, or closed in shoes after a summer of t-shirts or flip flops, but as soon as the temperate dips, be sure to dress appropriately. The change of the temperature signals many natural changes like migration and falling leaves- it also creates changes in our body. Our bodies know that cooler temperatures open the door for microscopic invaders. A scarf or hat can sometimes prevent that chill from lowering our immune system.
Switch your eating habits to include hot soups and homemade stews. Chili is a well-known fall food for a reason. Garlic, onion, and warming spices are a balm to the body and spirit. The vegetables found in a common chili can help our body fight off viruses and bacteria that begins to run rampant in our environment and also help our body align with the season. Cooked food is also more easily digested which can help if you are already coming down with an illness. Many spices used in traditional fall meals are actually antibacterial and will attack any germs that may be trying to cause havoc in your body so be generous with the cayenne and oregano!
Eat seasonal fruits and vegetables. Fall is a wonderful time for apples, sweet potatoes, mushrooms, squash and pumpkin, and beans. These foods give our body what it needs this time of year. The warmth, vitamins, and fiber from these foods fuel our body with energy and also gently stimulate the immune system. Add warming spices like cinnamon, nutmeg, cayenne, and ginger for an extra boost to the circulatory system and anti-viral benefits. Now is the perfect time to get out that soup pot and crock pot and make a hearty pumpkin soup, stir-fry, or stew.
This time of year, we need to increase circulation and include adaptogenic and anti-viral herbs that can help prepare you for the fall and winter include: Elderberry, Echinacea, yarrow, calendula, goldenrod, thyme, turkeytail mushroom. These herbs can be included in your cooking or taken as a tea or supplement. Tinctures are a fantastic way to take herbs in a ready-made dropper bottle (click here to view the tinctures in my shop) as they are available any time you need them. Adding lots of fresh thyme to your soups and stews is a wonderful way to assist your body as well as add a savory and rich flavor to your meals!
Tea. Drinking tea before the season fully changes is another way to signal to your body that it should begin to expect a temperature change. An Echinacea tea or calendula tea is especially potent as these herbs can prevent illness and strengthen the immune system before you are exposed to the common cold or virus. If you are already sick however, skip the elderberry and Echinacea, as these herbs are only effective before illness enters the body. The warmth from the tea stimulates your blood circulation which helps you feel more energized. Really enjoy this time as you sip your tea and make it a daily healthy habit. Consider journaling or reading during this time to relax your body and cozy into the season.
All transitions are beautiful parts of our world- taking a bit of time for self-care before stress and illness strike is a perfect way to align ourselves to nature and allows us to enjoy the beauty of the season that much more.
Ah, the sun is beginning to show its golden face and bless the garden once again. After a rainy and cool end to spring, the herbs are stretching their stems upward and branching out to begin their growing season journey.
There are so many interesting herbs and vegetables to grow each year that I have a hard time saying no to another seed packet or plant pot ending up in my cart. But in all of the hustle and bustle of weeding and harvesting, we need to take a moment and breathe and to actually ENJOY the herbs we are cultivating.
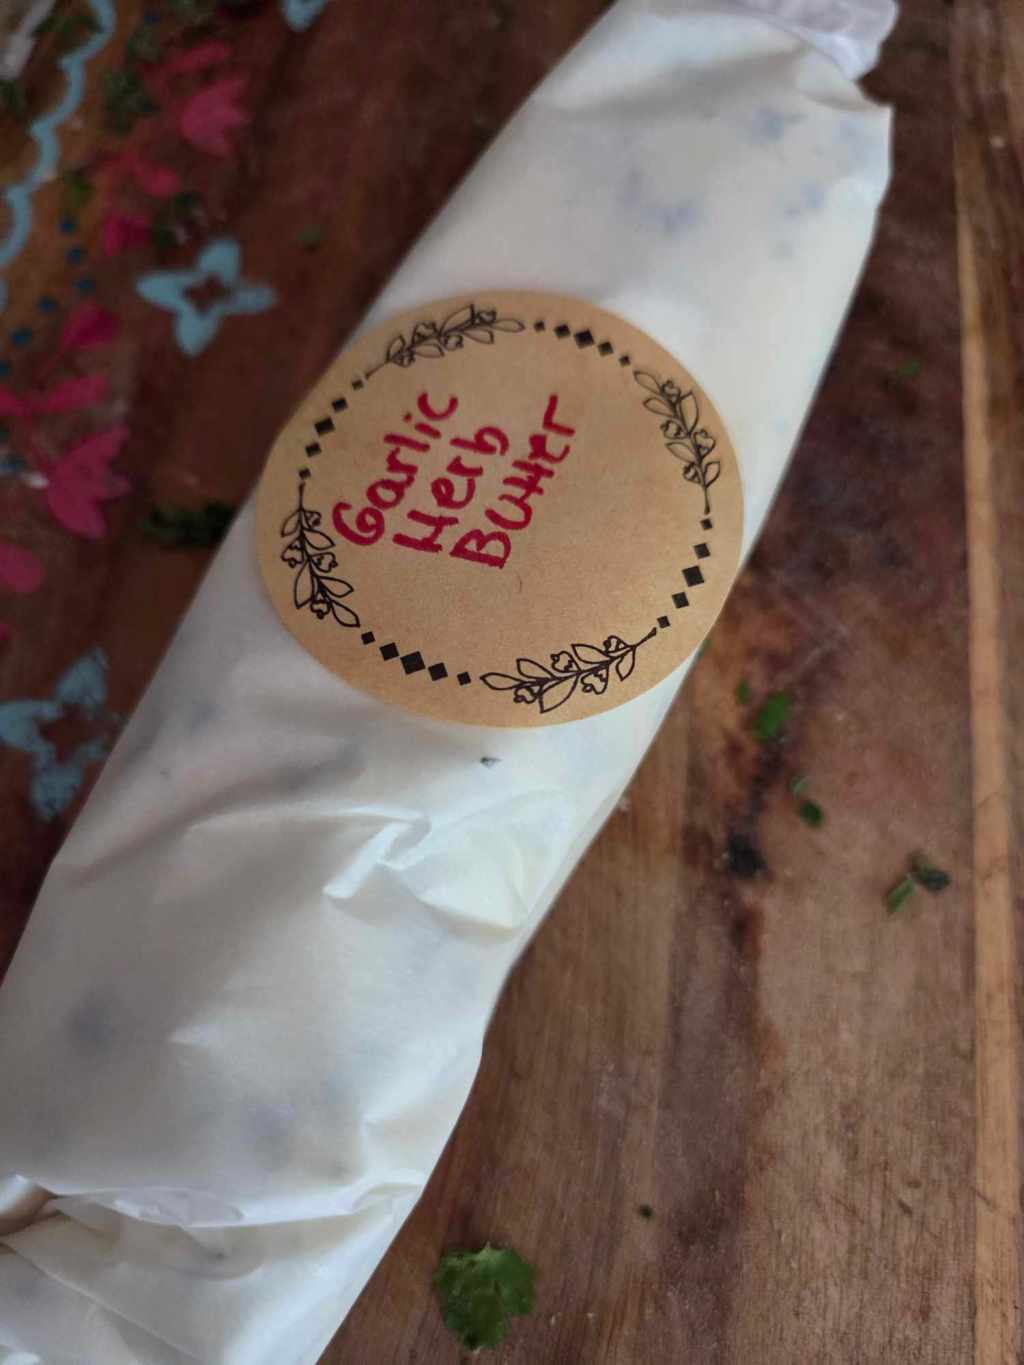
This post is devoted to being intentionally in the present and enjoying the growing season by making an easy and most delicious herb butter. By adding a few herbs into a stick of butter you can dress up any plain dish with flavor.
What you will need:
*2 Sticks of room temperature butter (salted or unsalted)
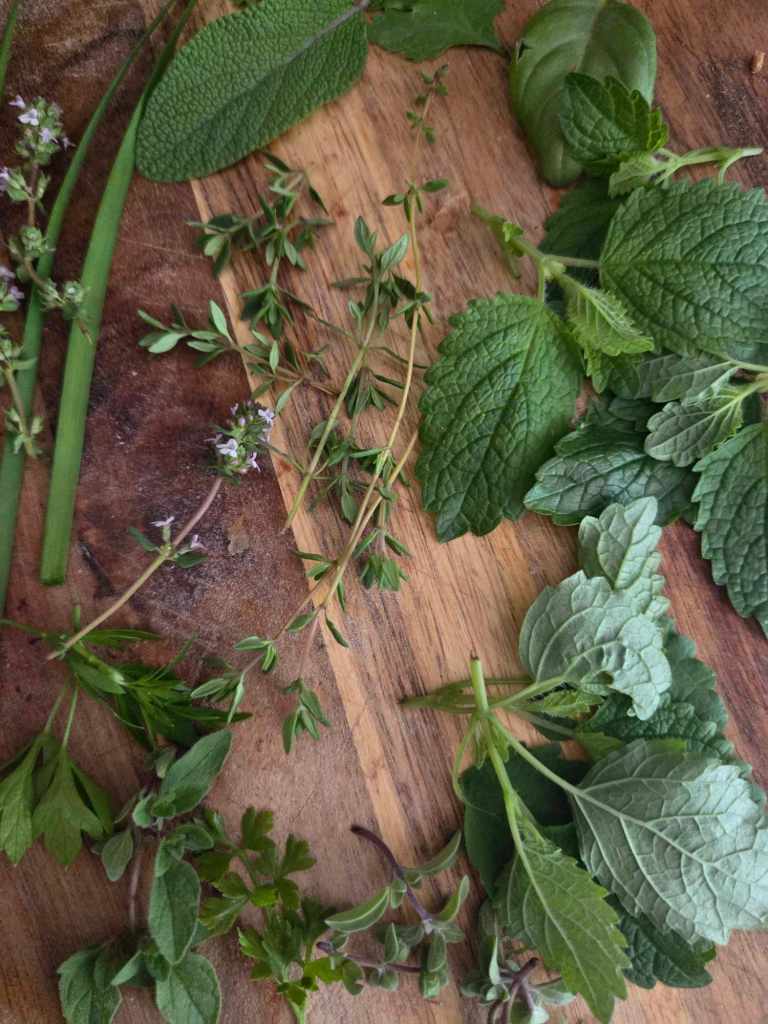
*Herbs! Whatever you have growing and want to use (fresh herbs have the best flavor in herb butter)
*Parchment paper
*Medium bowl
*Spoon or spatula
Instructions (with pictures):
Gather your herbs and carefully wash them in a bowl of water.
Dry the herbs by pressing down with a paper towel and then spreading them out on a flat surface for a few hours.
Chop your herbs finely and set aside.
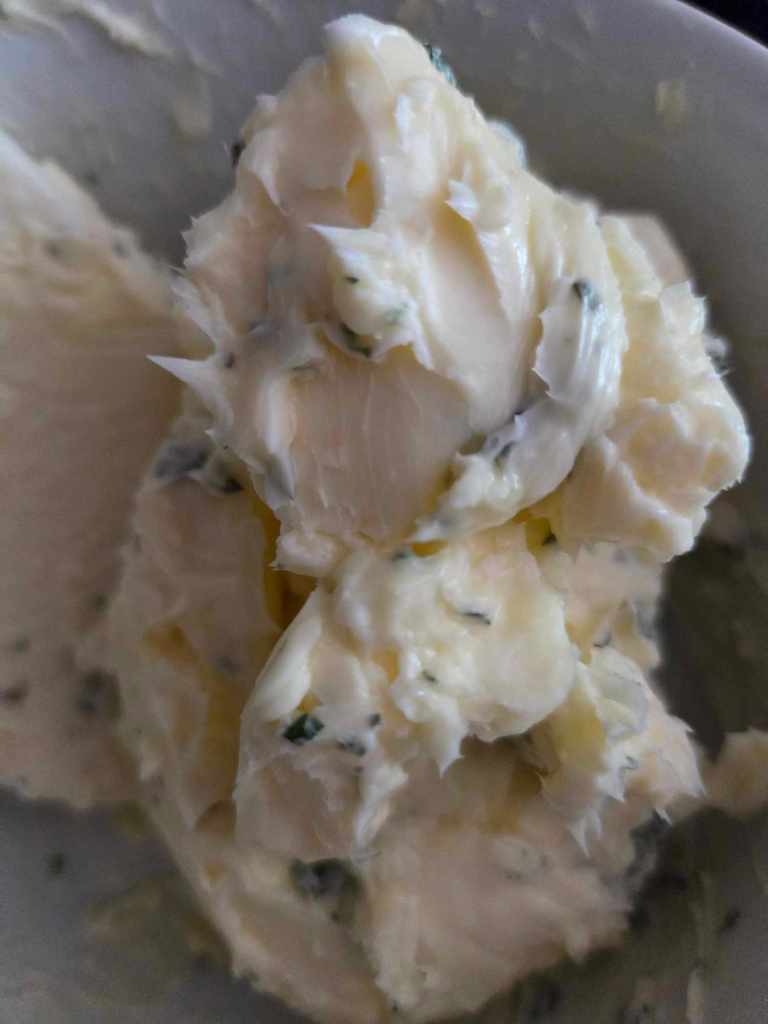
Take the two softened sticks of butter (make sure its not liquid. If it has become too warm just place in the fridge for a few minutes until its firm enough to form a ball) and place them in your bowl. Mash down the butter until it is smooth and workable.
Add salt to the butter if using unsalted (optional).
Add your chopped herbs into the butter and mix until well incorporated.
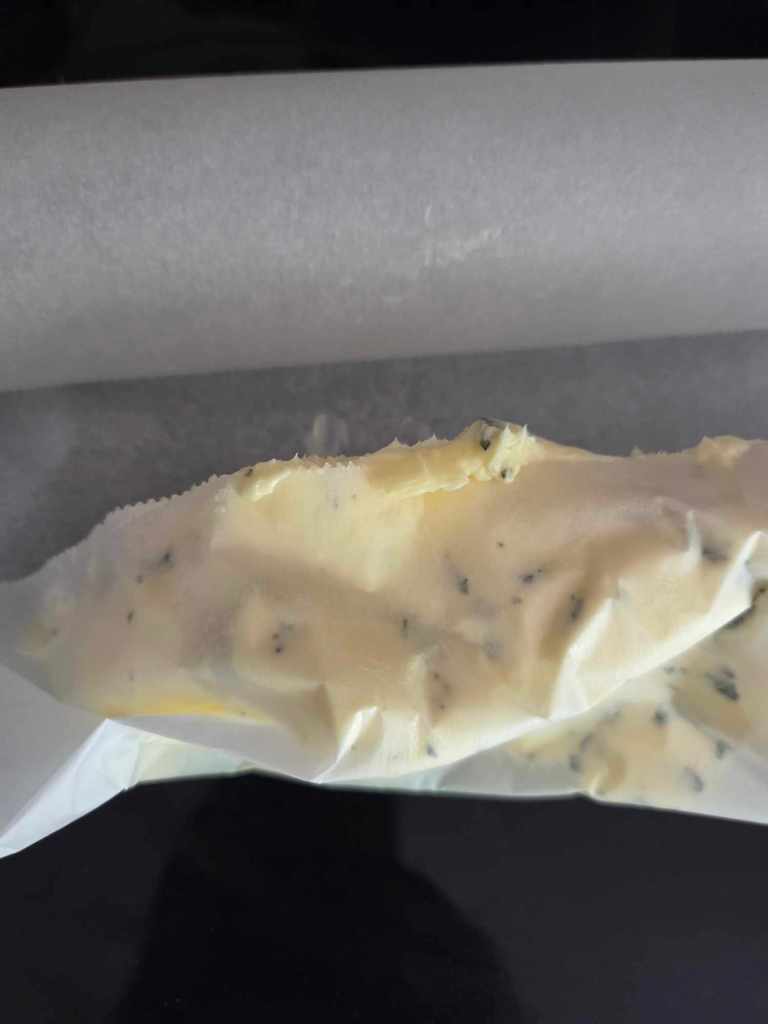
7. Spread out a sheet of parchment paper (about the length of an oven baking sheet).
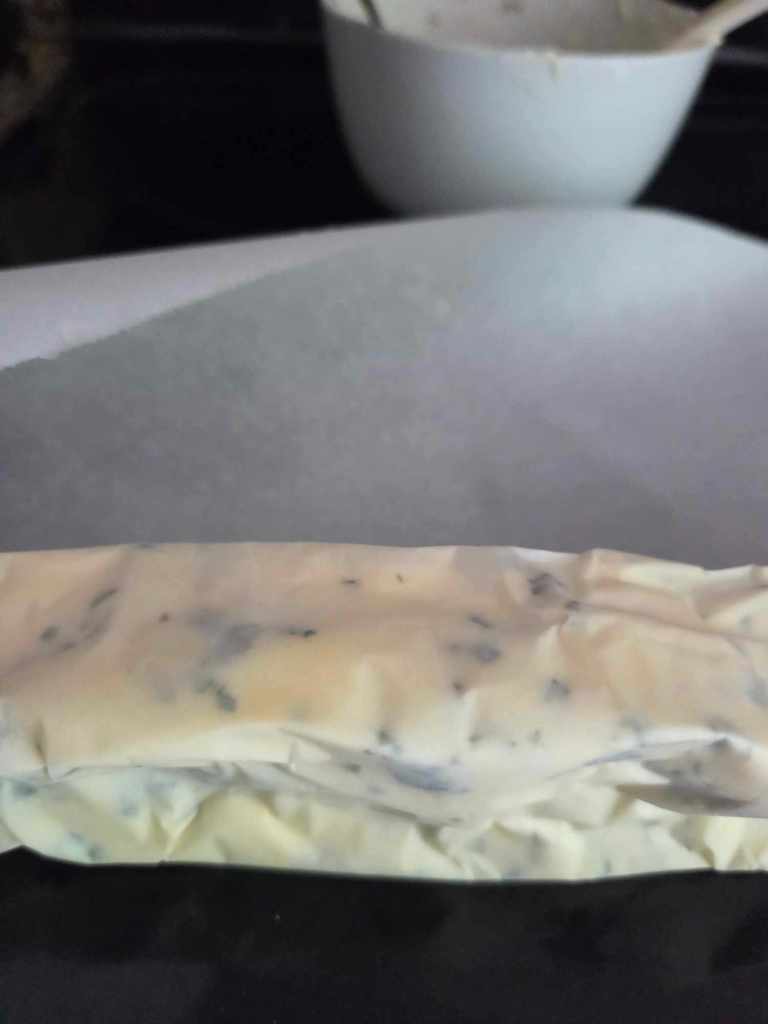
8. Place the entire ball of butter on one end of the parchment paper.
9. Tuck the end of the parchment over the top of the butter.
10. Carefully begin to fold the butter into the parchment as though you are wrapping a present.
11. Begin to carefully shape the sides and top of the butter to create a log or cubed shape.
12. Continue to wrap the butter until it is completely contained in the parchment.
13, Twist the sides of the parchment paper (like the end of a hard candy wrapper) to hold in place or tape all around the log.
14. Place immediately in the fridge to harden.
15. When you are ready to use, unwrap the butter and slice as normal.
Take a deep breath. The air is cleaner and headier than usual. All around us the trees are becoming fuller and sometimes crowned with flowers, the bees are zipping by on their way to get the day started collecting pollen and making honey. Animals are emerging sleepily from dens or are experiencing life anew. This eve before Beltaine feels like a threshold from the past to the future as we step into the sun of the lovely month of May.
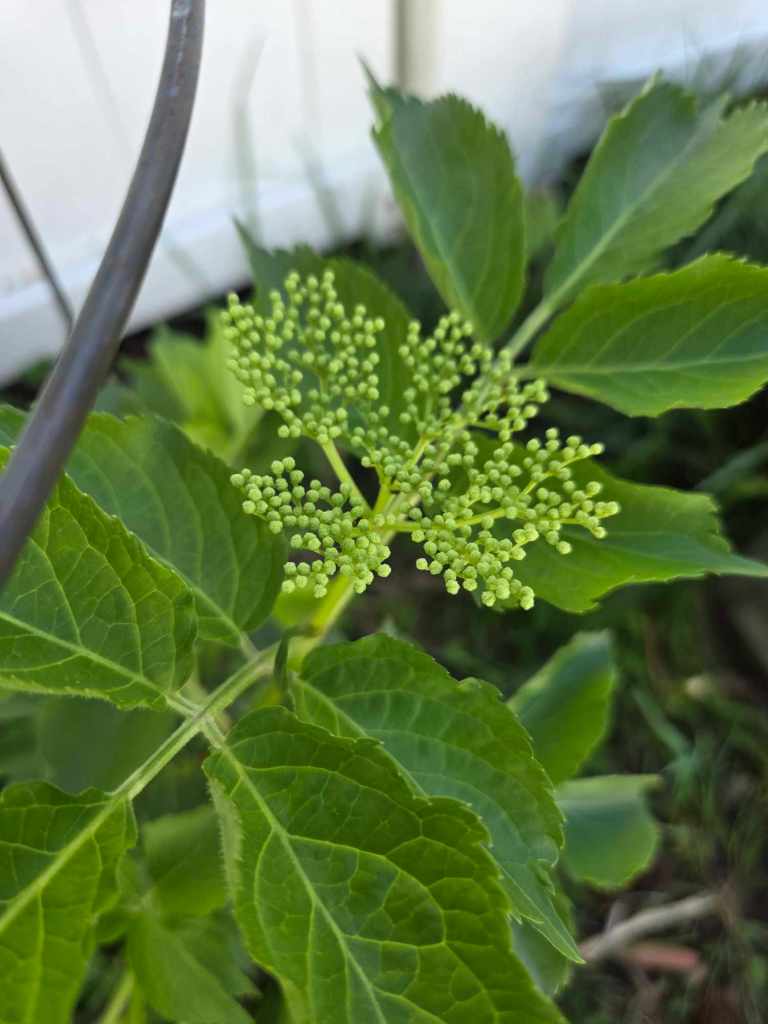
If you have been feeling frustrated lately or restless you are not alone. This new energy we are given by the spring season is meant to be used to advance our lives and fill us with inspiration. But it is so important to remember that some things take more time. Just look to the buds forming on the yarrow and valerian. Turn your gaze to the soft, white, delicate blooms that are strawberry flowers as they wait for pollinators. Nature reminds us that everything has a season, a moment, of perfection.
“But I am ready now!” you say. True, you are no plant or sleepy bear- you are a person with goals and ambitions ready to make change in your life. Keep that momentum and drive by keeping your inspiration alive. Sit with the present moment. Spend some time among the trees and creeks. Let the sound of the water soothe your mind and the sight of a coiled snake basking in the sun enliven you and remind you how luck you are to be a part of this world.
It will not be long until the buds open, the fruit develops, and then the cold comes. Enjoy this season as the days grow warmer and the rain brings forth life. Let yourself be in the present appreciating the harvests from years past and the one that is to come.
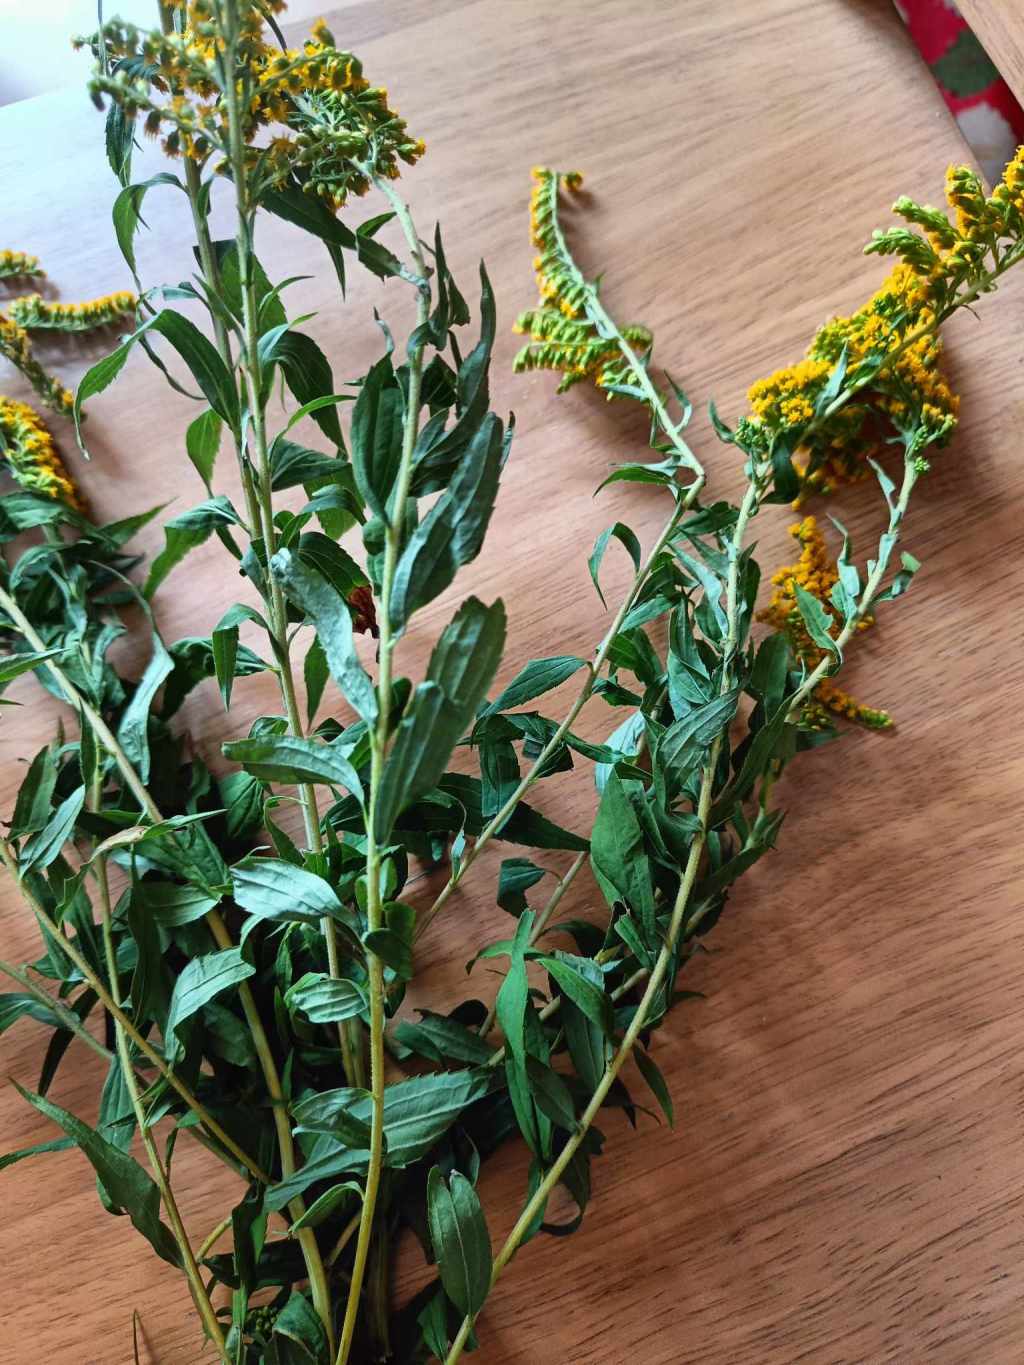
Goldenrod (Solidago Canadensis) is a fall feast for wildlife. The wonderful compact pollen in the flowers are greedily accepted by bees as their last meal before the frost. The cheery yellow flowers are wonderful to watch blowing in a field or forest edge, bringing to mind the filtered light of the sun that is cast this time of year.
It is fitting that this plant should be linked to the sun and its life giving properties as it is part of the Asteraceae family along with sunflowers. The restorative benefits of this herb have been well documented among indigenous people as well as early American literature. It’s latin name, solidago, means “to make whole”.
The flowers also makes a lovely mustard yellow dye which can be used to color clothing, wool, and other products naturally.
Contrary to popular belief, this flower does not cause seasonal allergies as the pollen is dependent on pollinators to be spread. Ragweed, which also blooms this time of year, is usually the culprit for the excessive sneezing.
In medicine, goldenrod is primarily used to help with urinary tract infections as it is a diuretic and will help you to reduce toxic fluids in the kidneys. However, there are other uses for this herb that are often overlooked.
Because of its link to the kidneys as well as the function of the plant as a food source for insects before winter, goldenrod is a remedy for exhaustion due to stress and overworking. It has a soothing and restorative quality, especially if there is a aching in the back. Energetically you can think of this remedy helping with qui or chi.
The color yellow also corresponds to the solar plexus and sacral chakra.
Benefits:
-beneficial for UTI and chronic kidney issues
-helps gout
-dries mucus in sinus/lungs
-helps to reduce allergies
-topical wound healing/insect bites
-reduce inflammation
About me: I am an herbalist who has been using natural remedies and homemade cosmetics for the last 9 years. After my children were born I wanted to create products that were sustainable, healthy for our mind and body, and affordable. -Jessica
Each month we experience a point of returning to a vivid reminder of our feminine energy. This is a beautiful process of our body that has the purpose to shed our uterine lining and prepare for the potential to have children. But many women dread this time of month due to discomfort and pain. Some women have anxiety about even getting their period on time, or for others, when the bleeding will stop.
Why do women have such issues with something that is so natural and should be as regular as the moon’s cycles? There are many reasons but it all comes down to one idea: balance. Our environment today is anything but natural. Humans have turned from their circadian rhythms in favor of productivity or entertainment, unnatural food is plentiful and cheap, our homes are filled with plastics and artificial materials which effect our hormones. Stress and poor lifestyle choices also play a role in how regular our moon time appears.
Allopathic methods often prescribe things like birth control, pain relievers, IUD’s or other chemically intrusive measures to bring relief or worse, they say there is nothing that can be done.
Herbs provide a more gentle approach to allow our body to return to a state of balance. Our bodies WANT to function properly. They want to feel comforted, nourished, and supported during menstruation. Our body is not the enemy that needs correcting or suppressing.
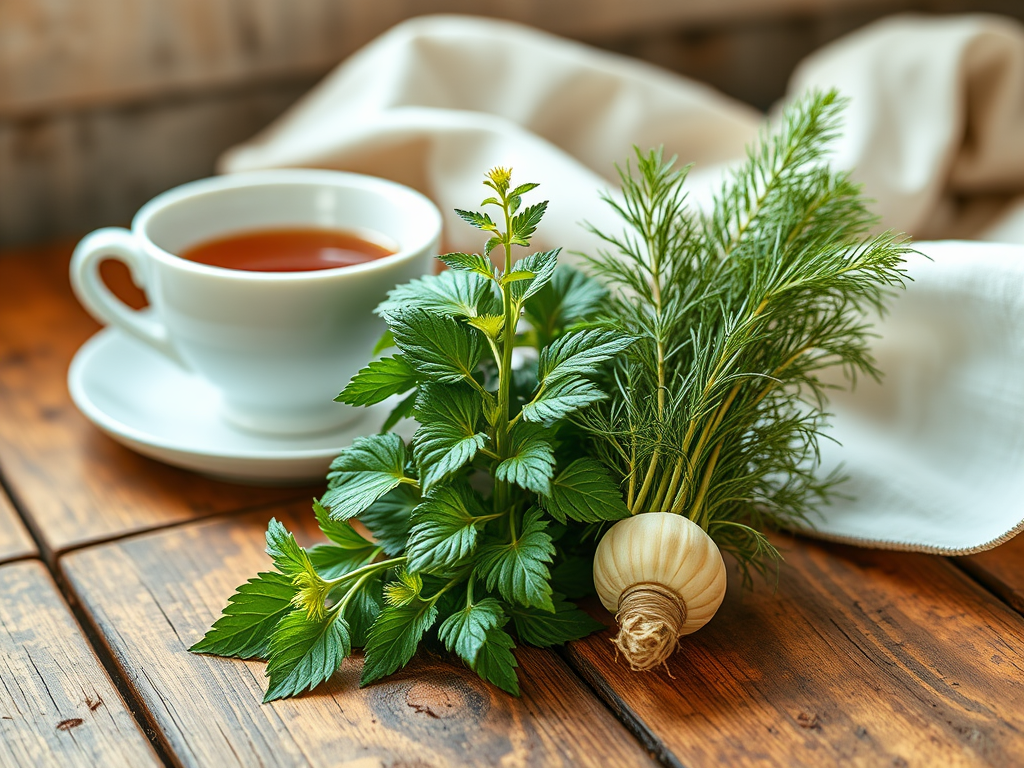
So what herbs are helpful for women who are suffering? Here are few of my favorites:
Lady’s Mantle (Alchemilla Vulgaris)- Named after the cloak of the Virgin Mary, lady’s mantle is well known to assist women with period pain and irregularity. Alchemists observed the way the leaves formed a type of cup that caught the morning dew and theorized that the gleaming drops would transform baser metals into gold. The tannins help to balance the menstrual cycle and over time will lessen the amount of bleeding by gently toning the uterus. The flavonoids reduce pain from cramping. It is also useful for endometriosis and fibroids.
Stinging Nettle (Urtica Dioica)-A nutritional powerhouse, stinging nettle is a plant that is very misunderstood. Nettles truly will live up to their name due to the stinging hairs present on their stems but, as a tea, there is no risk of being stung as the hairs have lost their histamine and formic acids. Often called “mother’s milk” nettles bring a sense of comfort. Filled with protein, vitamins, and iron, nettles bring much needed nutritious fulfillment during a time when the body is releasing vitamins and minerals. On top of this, nettles balance blood flow, stabilize sugar levels, balance hormones, reduce bloating and relieve cramps.
Fennel (Foeniculum vulgare)- Often used to flavor fish, this anise-scented herb is also surprisingly powerful. Fennel relieves period pain by lowering the prostaglandins in the blood. This helps with the tenderness and soreness we experience. Fennel is anti-inflammatory, relieves bloating and gas, and assists in regulating hormones. As it is a culinary herb, fennel is gentle and easily found.
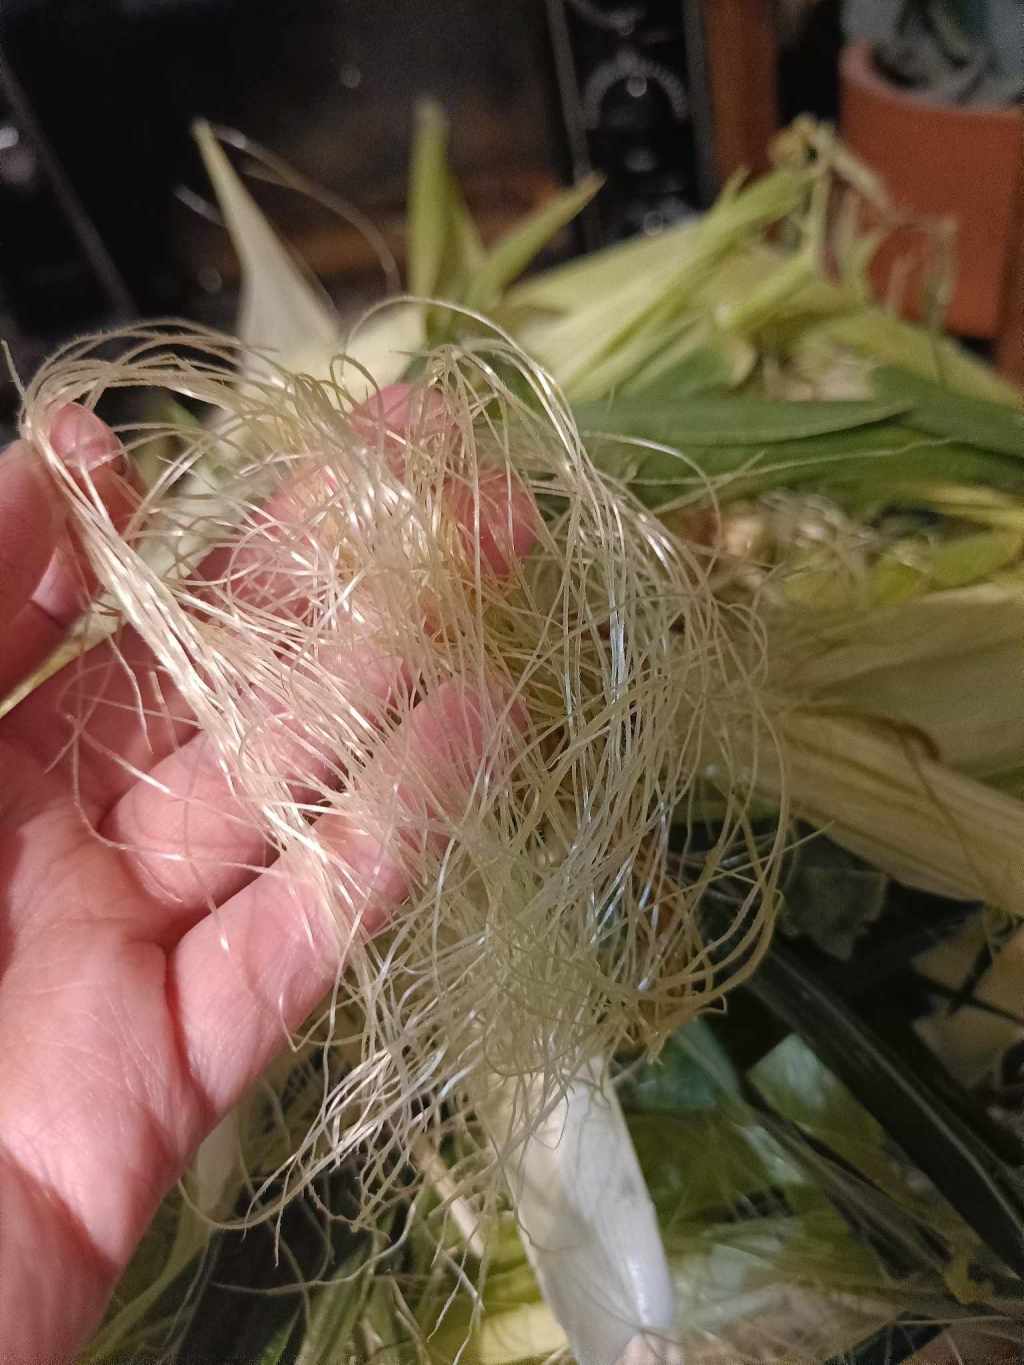
I cannot count how many times I’ve tossed the corn silk and husks into the garbage can without thinking. Husking corn can be tedious if you have a lot of it and is messy and time consuming and yet the beautiful golden strands found within the corn is incredibly medicinal. Native Americans and the ancient Mayans and Aztec civilizations were said to drink the tea of corn silk for its healing benefits.
It never ceases to amaze me how much medicine surrounds us in the natural world that we are entirely unaware of. What would the world be like if we were all taught from a young age about the healing power of different plants as well as the biology and phytochemistry that helps us understand how plants assist us. If the knowledge of plants and modern medicine could work together instead of against one another, we would have the life saving knowledge of both and the wisdom to know which is needed. I teach my children what I know in hopes that it will help them in some small way in an uncertain future when dealing with their own health or to help heal others.
Corn silk is one of those medicines that we discard yet is used the world over for healing.
This amazing natural medicine can lower uric acid, assist with gout and kidney stones, remedy bladder issues, lower high blood pressure, help to tone the bladder, lower high blood sugar, and is anti-inflammatory.
Your kidneys love the compounds in these fibers. This plant material is a demulcent which is incredibly soothing to the entire urinary system. Any burning pain or irritation in the urinary tract can benefit from this remedy.
Corn silk is rich in vitamin K which can be difficult to get in other foods. Vitamin K improves our body’s function in many systems including our blood to clot, our metabolism, and bone health.
The sterols and phytochemicals in corn silk lowers high cholesterol and improves blood circulation to strengthen overall health and body function.
Corn silk is a diuretic which helps to flush out bacteria in the urinary tract and to rid the body of bloating and unnecessary water retention.
The liver also benefits from this nutritive fiber. The secretion of bile is stimulated by the properties in corn silk which assists functioning of the gall bladder to aid in digestion .
On top of all of the amazing abilities this fiber has, it is highly nutritious, full of beta-carotine, riboflavin, menthol, thymol, selenium, niacin, limonene.
How to use it:
Tea
The easiest way to benefit from the amazing properties while receiving the nutritive benefits of corn silk is to drink it as a tea. Simply take a small handful of the fibers and put them in a heat proof jar. Cover with hot (slightly less than boiling) water. Cover with a lid and let steep for 15 minutes. Strain the fibers from the liquid. You can now enjoy as is or add some honey for taste.
Tincture
To make a medicinal tincture from corn silk, use fresh strands of the fiber. Pat dry or let sit on a paper towel for a few hours to reduce moisture if it is wet. You will need enough fibers to fill an empty jar so use the size of jar most appropriate for the amount of corn silk that you have. Make sure the jar is sterile and dry. Slightly cut the corn silk strands. This will help the alcohol to absorb more of the plant material. Fill your jar to the top with the strands. Then pour alcohol (I use 100 proof vodka for this) over the strands to fill the entire jar and completely cover the strands of corn silk. It is important to ensure that the plant material is entirely submerged to prevent air exposure. Seal the jar with a tight fitting air proof lid. Shake the jar daily for 4-6 weeks.
Notes:
*Only use organic corn to make medicine from. I suggest going to a local farmer’s market and asking (to be sure) that there are no pesticides used on the corn. Pesticide will defeat our purpose of using this plant matter to heal our body.
*If you are on blood thinners or have issues surrounding blood clotting be sure to ask a health professional if this is safe for you
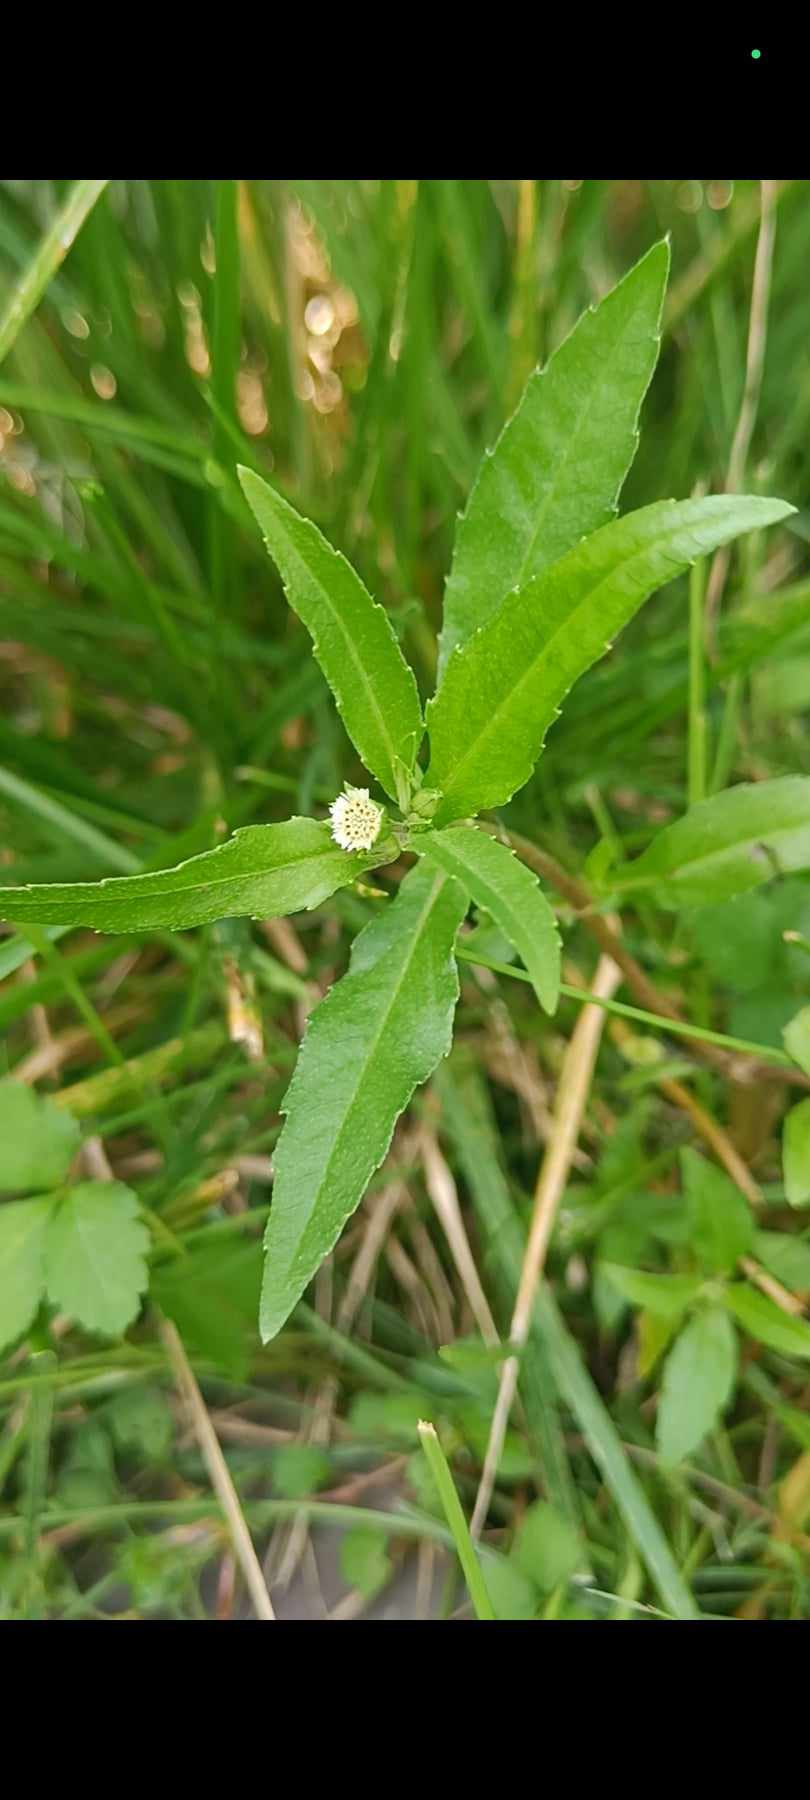
Yet another amazing healer has chosen to volunteer in my garden disguised as a “weed”. This plant was persistent. As I cleared the weeds and grasses crowding my garden walkway earlier this year, this was one that continued popping up. At last, defeated, I examined this interesting plant. I noted that it was in the sunflower family (one of the most common plant families) and took a good look at its structure.
The flowers were definitely strange and composite so I took out my phone and used google lens to identify it, carefully examining and comparing the plant to the pictures and descriptions. Then I brought out my books and did some research. Surprisingly, this healer was not found in any of my medicinal book collection. I turned my focus online to studies and databases, scouring for legitimate, reliable resources. I didn’t find as much information as I thought but what I did find, surprised me.
This plant has a rich history of use in Ayurvedic medicine and Traditional Chinese medicine. One big theme in all herbal traditions surrounding this herb is hair growth. Flavonoids and phytochemicals within this plant are responsible for protecting weakened hair shafts as well as stimulating new hair growth. It was more of a folk remedy in Asia, used mainly for this purpose.
But that is not the most amazing feature of this humble plant. Research shows that this herb’s anti-inflammatory and antioxidant properties protects the liver from inflammation. It contains wedelolactone and dimethyl-wedelolactone which perform anti-toxic actions and helps to regenerate liver cells. It is thought to help with hepatic steatosis, hepatomegaly, liver fibrosis, hepatitis, spenomegaly, and jaundice to name a few of its many actions.
There are recent studies from the NIH which explore the use of Eclipta Prostrata’s ability to treat cancer. In 2023, this study found that the flavonoids and phenolic compounds exhibited potent free-radical scavenging abilities and reducing power in stomach cancer and colon cancer.
On top of this, many western herbalists seem to be more unaware of the healing abilities of this plant because it is still being tested and explored, potentially unlocking new uses to the incredibly long list of cures it currently has.
A few other reported uses of this plant are for urinary tract infection, anemia, pain relief, and skin healing.
Perhaps this quiet, mysterious plant will help to pave the way for more people to open their minds to the healing powers of the plants all around us in our local yards, parks, and gardens. Let your weeds grow wild!
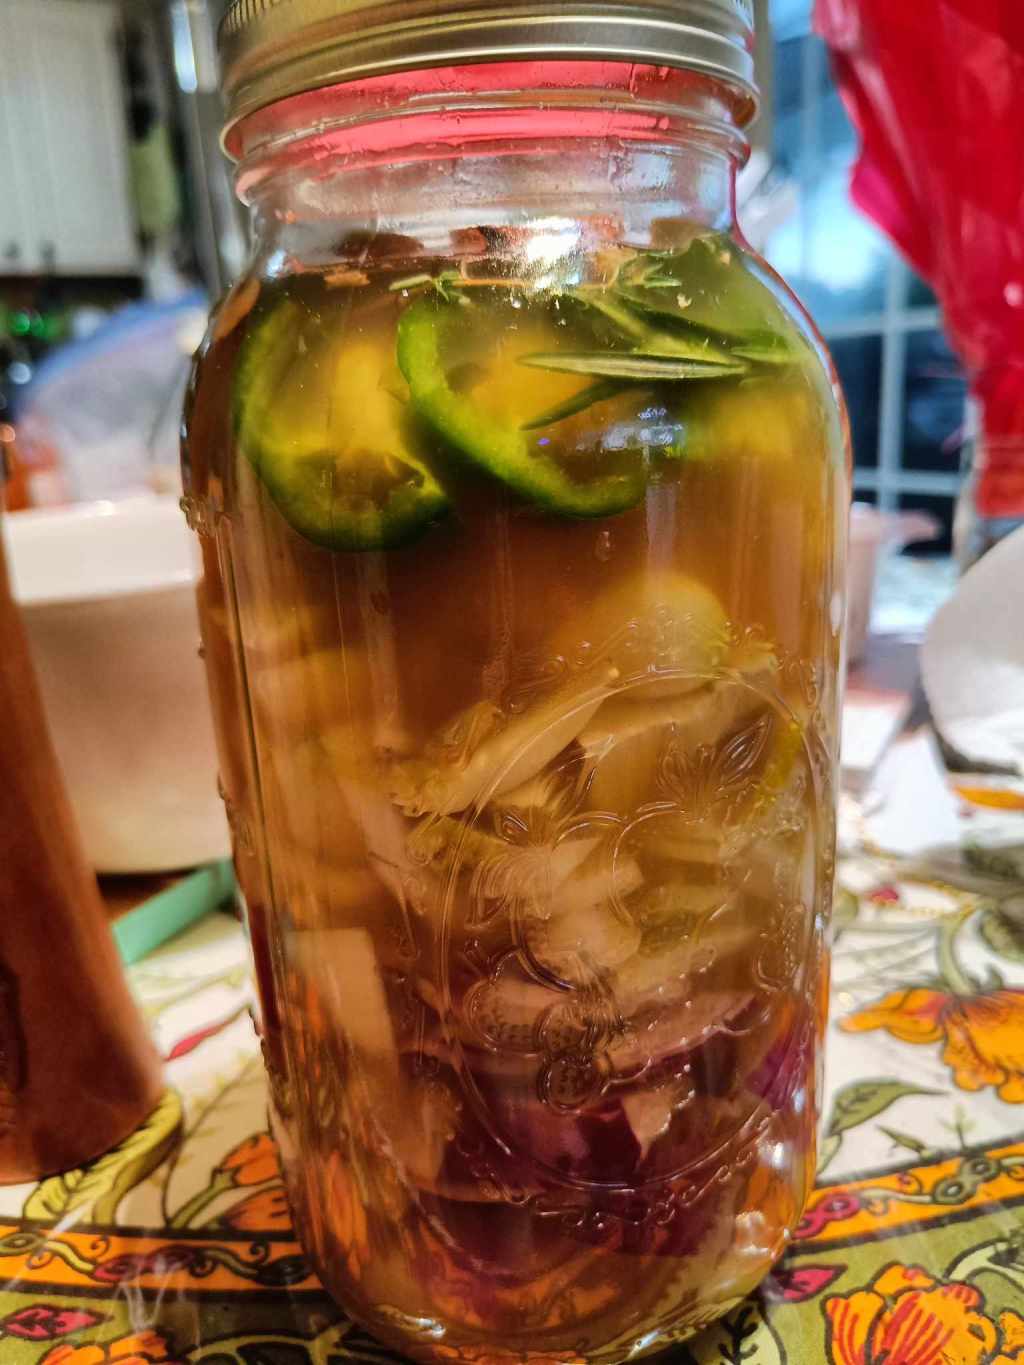
When I first heard of adding fresh vegetables, fruits, and herbs to vinegar my first thought was “won’t that make you sick?” This was long before I studied herbalism. Despite my hesitation I began to see that fire cider had a rich history and was a traditional folk remedy for colds and flu. I now make this beautiful, powerful concoction every year and truly look forward to process. As the seasons change and summer slowly begins to ebb, I automatically think about the months ahead and the thought of chopping the aromatic ingredients and placing them in layers in the jar feels very cozy. It is a late summer ritual that prepares us for the rest of the year.
Fire cider as a medicine is effective because vinegar can extract certain chemical compounds that water or other liquids cannot. The organosulfur compounds, allicin, and volatile oils from the onions and garlic are extracted and preserved into the vinegar as well as the nutrients from the other ingredients to create a tonic.
Fire cider works by warming the system and helping the body to fight off the virus or illness itself. This doesn’t “cure” the cold but it does shorten the duration and help you find relief. The ingredients listed help circulation and opening the bronchial tubes, expelling mucus, and reducing inflammation.
There are many different versions and this one is close to the basic recipe to keep things simple (simple is often the best!).
Many people tend to get sick around the fall so I like to start now in early August with making this wonderful natural medicine. This will ensure that if you pick up a cold in September, your ferment will be ready.
When making fire cider, the most important ingredient is apple cider vinegar. I wouldn’t recommend trying to use white vinegar for this because the taste is less appealing and believe me, it will already have quite a punch! Organic apple cider vinegar with the mother is best. Luckily this is widely available and fairly inexpensive.
I advise using a gallon sized mason jar. It’s easily sterilized and is less likely to break. Also a fermenting lid will save a you a lot of trouble. The metal lids can corrode over during the fermenting process. Also, the fermenting lid lets you to skip the step of “burping” the jar. This is opening the lid to let out the gasses forming inside the jar during the fermentation process.
With the rest of the ingredients, in all actuality, they are optional and changeable. If you do not have any jalapeno peppers, omit them! If you have only white onions, omit the red onion. Each ingredient does have a different chemical profile that can affect the way it works on your body so if you omit something or swap an ingredient it may change how the overall formula operates but the main ingredients are the vinegar, onion and garlic. From there, you can be more creative after you feel comfortable. I recommend following this recipe at least once to get a good grasp on the flavor and process and after that compare to other recipes or try some ingredients of your own!
Materials
Chopping board
Sharp knife
Gallon sized mason jar
Metal mason lid ring (wide mouth)
Fermenting lid
Ingredients:
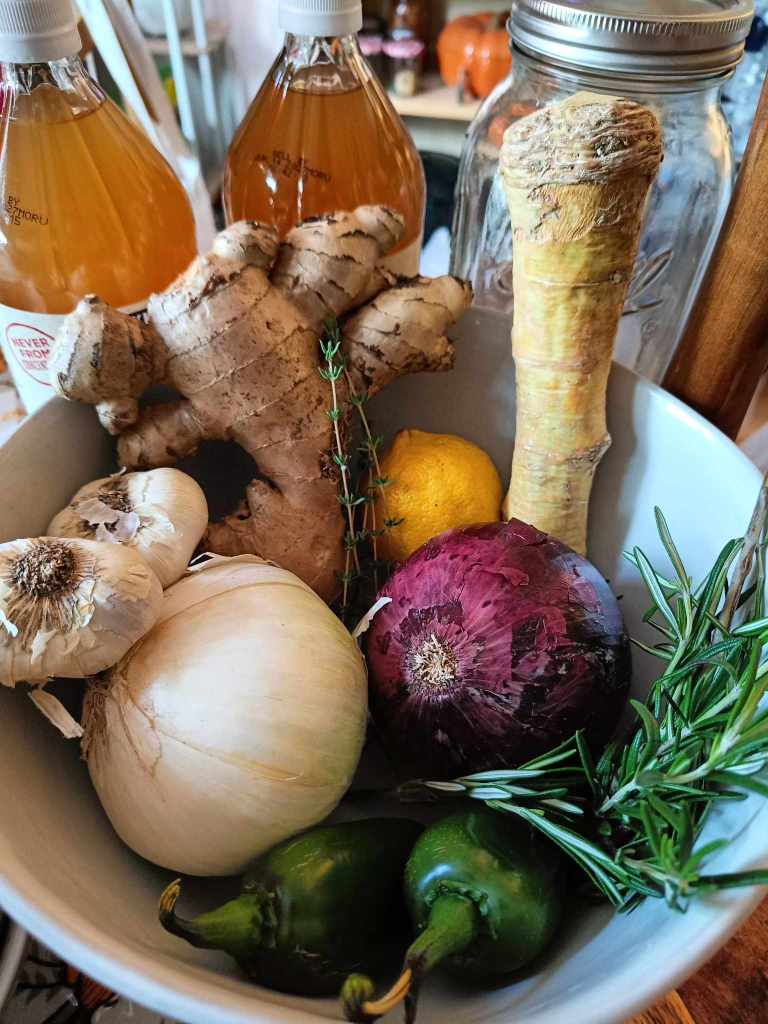
Apple cider vinegar (whole large bottle will be used)
1 red onion
1 white onion
2 inch pieces of Ginger root
1/2 cup Fresh horseradish root
2 heads of garlic
2 Jalapenos
1 lemon (zest and juice)
Pinch of Turmeric
Pinch of Cayenne pepper
Fresh rosemary sprig
2-3 springs fresh thyme
Instructions:
Start with a very clean gallon sized mason jar. It must be completely dry as any added water will dilute and potentially spoil the ferment.
Remove the skins of the onions and chop them roughly. The size and shape do not matter very much since this will be strained but chopping allows the nutrients to be better absorbed by the vinegar. Add them to the jar.
Next remove the skins of the garlic. You can chop them if you’d like but it is unnecessary and you can just add them to the jar.
Slice the jalapenos and add, including the seeds and add them to the jar.
Zest the lemon on a grater and add to the jar. Then slice the lemon in half and squeeze each half into the jar.
Add a pinch of turmeric (up to 1 TBS is fine).
Add a tiny pinch of cayenne pepper. Trust me it will go a long way here.
Add a sprig of fresh rosemary and try to push it down along the sides of the jar so it will stay down and not rise back to the top. I like to use the edge of a knife to do this.
Repeat step 8 with the sprigs of thyme.
Pour the entire bottle of apple cider vinegar into the jar over the other ingredients.
Put the rubber lid on and then the metal ring and tighten onto the jar.
Shake!
Place in a cool, dark, place to ferment for 4-6 weeks. Be sure to shake daily.
Strain the fresh ingrdients after 4-6 weeks and place into either a different jar or reuse the same jar. Seal and place in a cabinet. You no longer need to shake it after this point.
For colds take 3 TBS a day either by spoon or in a glass with honey and lemon juice. For prevention take 1 TBS a day.
Get creative! Use this on salads as dressing, add to soups or other meals!
Notes:
*This will smell particularly pungent while fermenting. After a few weeks, the smell will calm down to some extent but it will still be pungent wherever you decide to store it. No one prepared me for this when I first started.
*Be sure to use fresh, ripe vegetables. Don’t use spoiled roots or herbs.
*I remove the skins because skins can introduce pesticide or bacteria into the fermentation process but I know there are some who choose not to remove the skins here as they will be strained eventually.
*Be sure to cover the vegetables completely with vinegar. If pieces are rising to the top, they will not be protected by the fermentation and could spoil. Shaking helps to resolve this but if something is noticeably uncovered by the vinegar, I usually add more vinegar or try to push it down with a fermenting stick or clean spoon or knife.
*You can use the fire cider before it is completely done but I would wait at the very least for 3 weeks. This is because the fermenting gets particularly odorous and creates gasses before this that are unappetizing.
*Horseradish- this is a great ingredient as a fresh root. If you cannot find the fresh root, I don’t recommend using the bottled variety. There are added ingredients in the pre-processed horseradish sauces that may spoil the ferment. Sadly its better to omit it completely and be safe rather than sorry.
*How long will it keep? Vinegars can have a long shelf life. Provided that you have strained the concoction well, it should keep for at least 1 year. Always smell and examine the mixture for any strange changes after you have strained it before tasting.
I hope you enjoy and consider giving this recipe a try. It’s not as hard as it may seem at first to make. It is an enjoyable process and a formula that can help you stay well through fall, winter, and next spring!
Our first instinct when working with cayenne peppers is to protect our skin and eyes from the burning heat of this spicy fruit. Cayenne is a versatile herb used for fiery culinary creations and pest control but cayenne is extremely medicinal as well. The heat warms our circulation and brings relief to our joints and aching muscles.
That said, you’ll still need to use some caution while preparing this remedy!
Capsaicin is an alkaloid which gives cayenne it’s spicy flavor and delivers relief from pain. Amazingly, this alkaloid reduces the amount of pain chemicals that are sent by the brain, literally commanding our body not to hurt! This pain relieving action can help with back pain, stiff muscles, arthritis, muscle cramps, nerve damage, fibromyalgia, rheumatoid pain and osteoarthritis. Capsaicin is incredibly anti-inflammatory, soothing the burning around joints that can come from these conditions.
You will want to wash everything, including your hands, throughout this process so as to avoid getting pepper into your eye or sensitive areas. Also be sure to wash your bowls and tools carefully as this can be a little messy and the pepper will be on those too.
With a few ingredients and some time, you can craft a salve that will be wonderful for quick pain relief.
Ingredients:
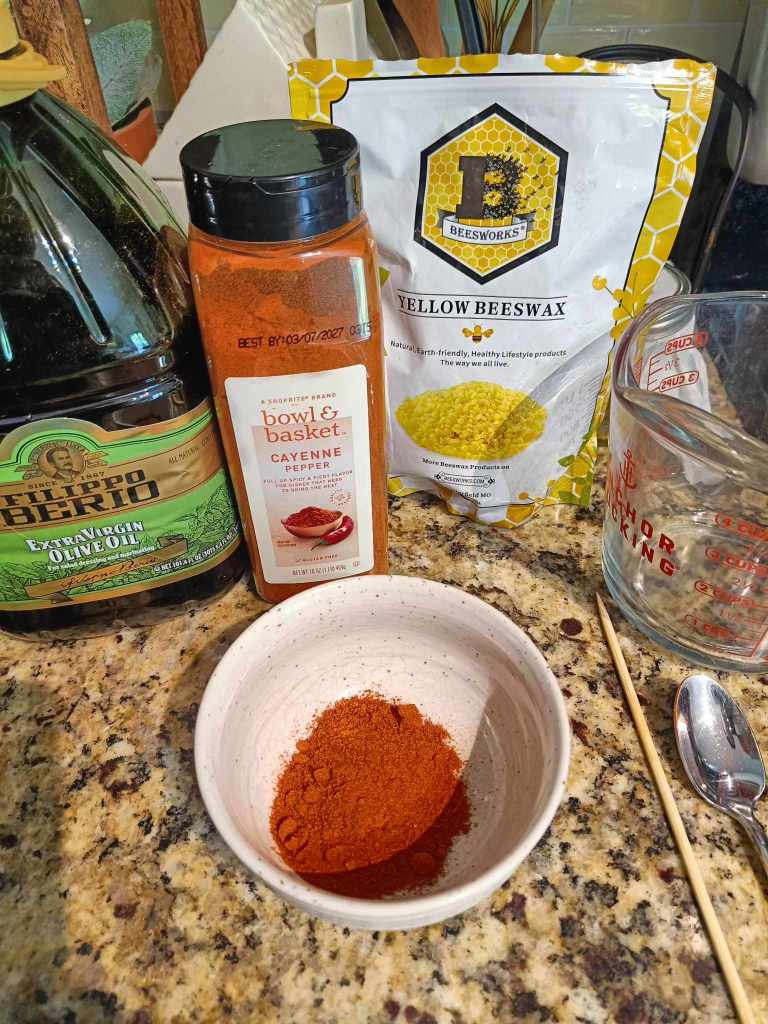
Cayenne pepper-2 TBS (powdered)
1/2 cup olive oil
1/2 ounce of beeswax
Essential oils (optional)
Supplies:
2 jars (for filling with the salve)
Pan (for double boiler)
Glass pitcher, bowl, or heat proof jar (for double boiler)
Bowl to strain oil
Cheesecloth
Mesh strainer
Towel (to place under jars to avoid cracking)
First you’ll need to create an infused oil. Pour your olive oil and cayenne pepper together in a mason jar or glass heat-proof measuring cup. Stir together with a spoon or chopstick. Place the jar into a pan filled with water to create a double boiler.
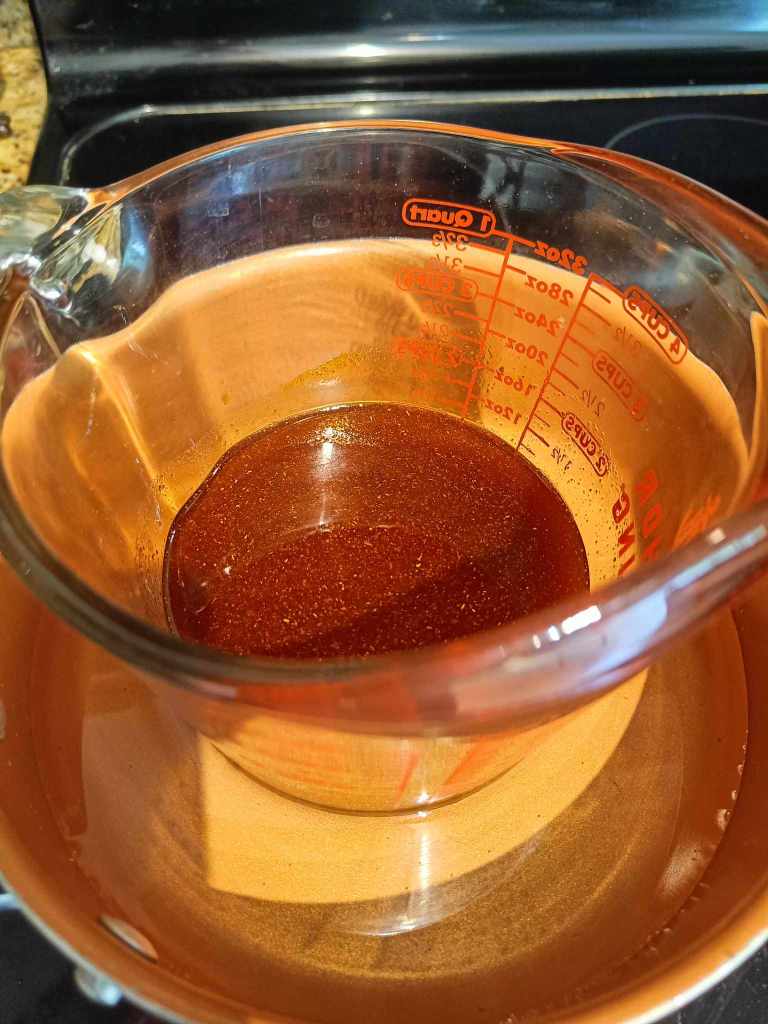
Turn the heat on low. Allow the oil to simmer for 3-4 hours. Check on your oil often and give it a stir. You may need to add water to the pan surrounding your jar if it evaporates.
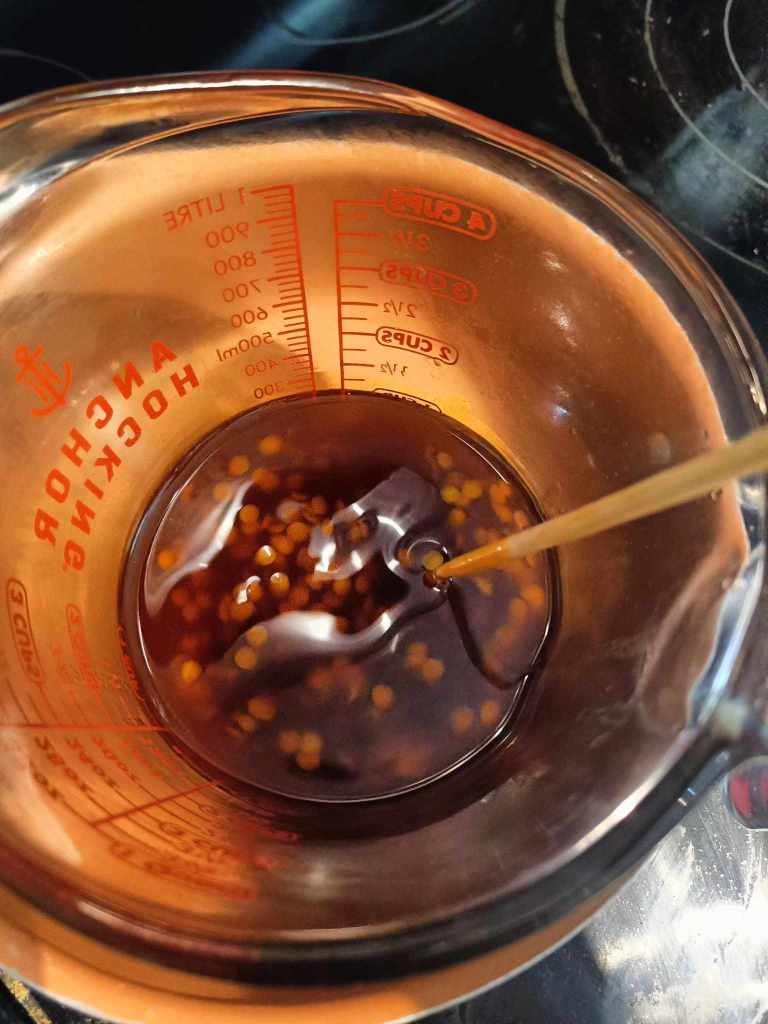
After a few hours, the oil will be infused. It should be a rich shade of red or orange. Strain your oil through a cheese cloth and into a bowl or clean jar. This will remove the flecks of pepper to create a smooth salve.
Pour your oil into a container that you will place back on the pan (double boiler).
Add the beeswax into the infused oil and let it simmer until fully melted (have patience with this step! If the wax does not melt completely it will be rough and grainy on your skin). Stir often to help the beeswax incorporate.
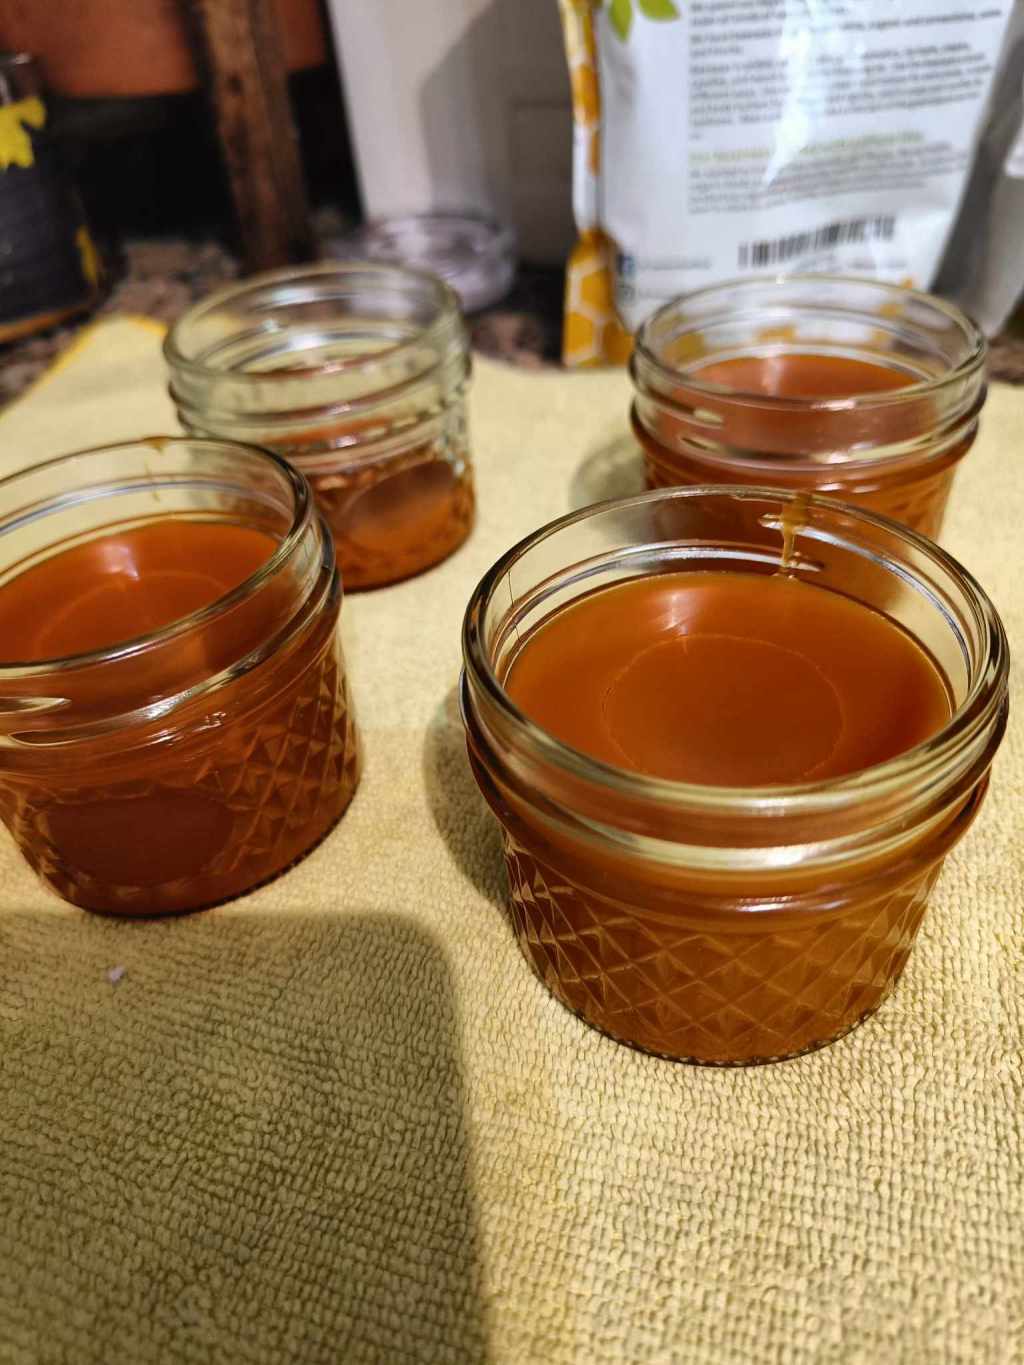
Once fully melted, add essential oils (if using) and pour into clean jars. Place your towel down before filling the jars to avoid the glass from shattering from the temperature difference. I like to use mason jelly jars for salve but any clean jar (even an old sauce or pickle jar) will work.
Allow to cool and place the lid on your salve. Be sure to label it!
Notes:
*You do not need essential oils for this recipe but certain oils like lavender, peppermint, clove, or ginger can add to the pain relieving qualities even further and add scent.
*This will be spicy! Be careful where you are applying the salve on yourself (avoid eyes and mucus membranes) and avoid using on open wounds.
*Wash your hands after applying the salve onto your skin (unless it is for hand pain) to avoid spreading it to unwanted areas of your body (or other people’s body!)
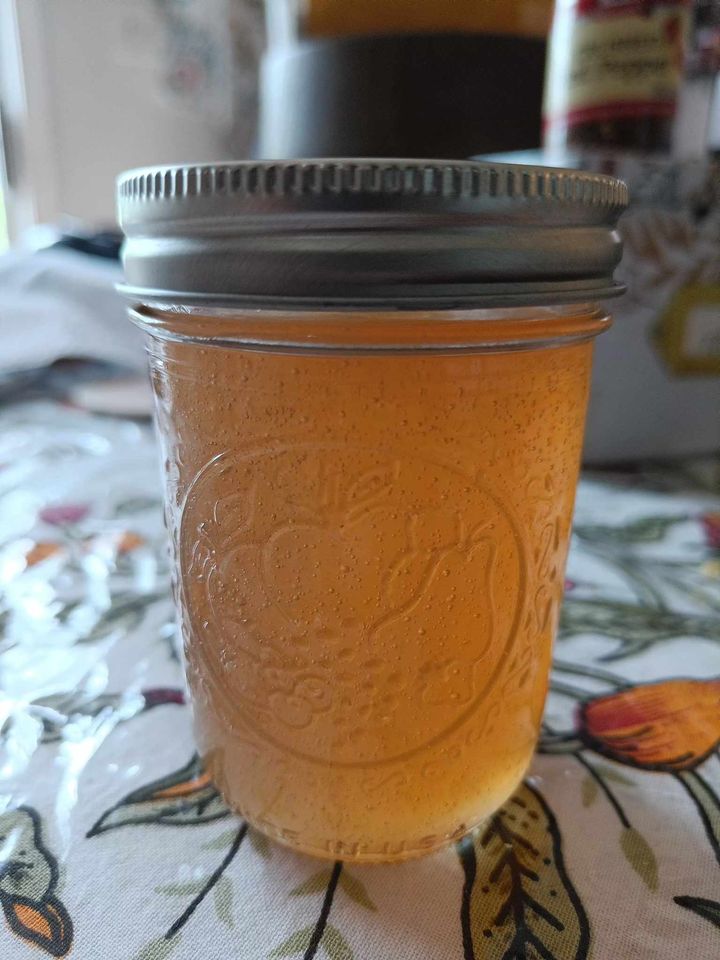
Clovers are prolific and often regarded as weeds. We have been conditioned to think, a yard full of clovers needs mowing! But in reality, clovers are beautiful flowers with many health benefits. This tiny flower is also a favorite of bees. Red clovers were traditionally used as a blood purifier while white clovers were associated with fairies and also purity.
Both clovers contain healing properties for our body. White clover (Trifolium repens) contains vitamins A, B2, B3, C and E as well as nutrients and minerals like magnesium, Chromium, potassium, and calcium. (Trifolium repens) has a delightful vanilla-apple flavor that it lends to teas, baked goods, and of course, jelly. As an herbal remedy, white clover is helpful with rheumatic and joint pain, boosting the immune system, congestion and cold symptoms.
White clover jelly is such a treat. If you have children, this is a great family activity as kids love to gather the flowers and love the sweet taste of the jelly.
For this recipe, you will need:
*2 cups of fresh clover flowers (stems removed)
*Original Pectin (3 TBS)
*4 cups sugar
*1/4 cup bottled lemon juice
*Water bath canner and canning tools
*Mason Jelly jars with lids and rings (5)
*Water bath canning tools
*1 quart sized jar
*2 TBS vinegar
* 2 1/2 cups boiling water
First you will need to gather the 2 cups of clover blossoms. Choose fresh, soft and fluffy white clover flowers, selecting carefully and not picking any spent brown blooms. (watch out for bees as they are partial to these flowers).
Next, rinse the flowers in cold water in a colander to rinse off any dirt, debris, or insects.
Place the rinsed flowers in a quart sized mason jar and set the jar on a towel or surface that is heat safe. Pour the boiling water into the jar and fill it (I like to boil the water in a kettle for easy pouring!), Cap the jar with the lid and ring and let the infusion sit overnight.
Set up your canning area with your cleaned tools, towel, and jars. You can also begin warming your water bath and jars.
Strain your clovers through using a cheesecloth or jelly strainer, leaving you with a milky, yellowish color liquid.
Pour the liquid into a pot. Add in your lemon juice and pectin.
Turn the heat to high and stir until it reaches a boil. Set a timer and stir through the boil for 1 minute.
Add in the sugar and bring to a boil once again. Stir continuously. When it reaches a boil, set timer and stir for one minute more.
Remove from heat and skim off any foam residue which may have settled on the top.
Ladle jelly into jars and leave 1/4 inch headspace. De-bubble.
Wipe off the top and sides of rims of each jar with vinegar after filling and place the lid and ring on (finger tight).
Place filled, lidded jars into canner.
Process for 10 minutes. Turn off heat.
Let sit in canner for about 10 minutes. Carefully remove lid from canner and lift jars from water bath.
Let jars sit on a towel for 24 hours undisturbed.
I hope you enjoy making clover jelly! It makes a great gift and many people enjoy the unique taste of the clovers.
StarsandYarrow is a space to connect to the sky and earth. Nourishing our mind, body, and spirit with soulful reflection and physical healing. I create hand-made tinctures, balms, cosmetics and candles to support you in your healing and natural product journey and I hope you will enjoy being here!